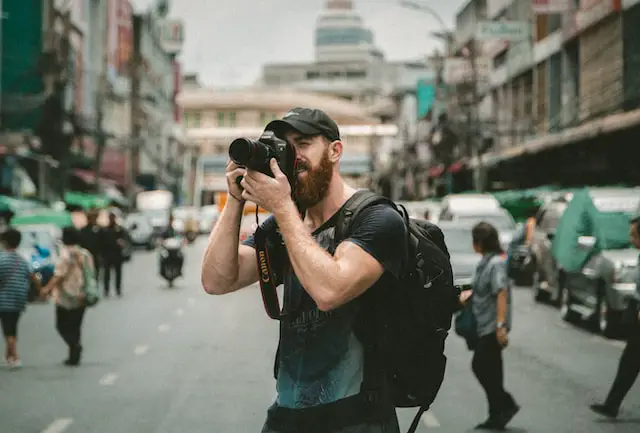
Understanding the basics of photography can be daunting, especially when it comes to ISO, shutter speed, and aperture. These three elements form the foundation of the exposure triangle, which is essential to capturing a well-exposed image.
In this article, we will explain ISO, shutter speed, and aperture in a clear and concise manner, so you can take your photography skills to the next level.

ISO is the sensitivity of your camera’s sensor to light. A low ISO number (e.g. 100) means that the sensor is less sensitive to light, while a high ISO number (e.g. 3200) means that the sensor is more sensitive to light.
Shutter speed, on the other hand, is the amount of time the camera’s shutter remains open to allow light to hit the sensor. A fast shutter speed (e.g. 1/1000) freezes motion, while a slow shutter speed (e.g. 1/30) creates motion blur.
Finally, aperture is the opening in the lens through which light passes. A wide aperture (e.g. f/1.8) allows more light to enter the camera, while a narrow aperture (e.g. f/16) lets in less light.
By understanding how ISO, shutter speed, and aperture work together, you can take control of your camera’s exposure settings and create stunning images. Whether you’re shooting with a digital or film camera, mastering the exposure triangle is essential to capturing the perfect shot.
So, let’s dive in and explore ISO, shutter speed, and aperture in more detail.
Table of contents
Understanding ISO

ISO is one of the three pillars of photography, along with shutter speed and aperture. It is a measure of the camera’s sensitivity to light.
A low ISO value means the camera is less sensitive to light, while a high ISO value means the camera is more sensitive to light.
The Basics of ISO
ISO is typically expressed as a number, such as 100, 200, 400, 800, or 1600. The lower the number, the less sensitive the camera is to light, and the higher the number, the more sensitive it is. Each increment in ISO value doubles the sensitivity of the camera.
ISO and Light Sensitivity
A higher ISO value allows you to shoot in low light conditions without having to use a slow shutter speed or wide aperture. This can be useful in situations where you want to freeze motion or capture a sharp image without a tripod. However, a high ISO value also increases the amount of digital noise in the image.
ISO and Digital Noise
Digital noise is the grain-like effect that appears in images shot at high ISO values. It is caused by the camera’s sensor amplifying the signal to compensate for the lack of light. The higher the ISO value, the more digital noise you will see in the image.
Auto ISO and When to Use It
Auto ISO is a feature that allows the camera to automatically adjust the ISO value based on the available light. It can be useful in situations where the lighting conditions are constantly changing, such as when shooting outdoors on a cloudy day.
However, it’s important to note that using a high ISO value can also result in a loss of detail and color accuracy in the image. Therefore, it’s important to use Auto ISO judiciously and to manually adjust the ISO value when necessary to get the best image quality.
In summary, ISO is an important aspect of photography that affects the camera’s sensitivity to light. Understanding how ISO works and how to use it effectively can help you capture better images in a variety of lighting conditions.
Mastering Shutter Speed

Defining Shutter Speed
Shutter speed is the amount of time that the camera’s shutter is open, allowing light to enter and hit the camera’s sensor. It is measured in seconds or fractions of a second. The faster the shutter speed, the less time the shutter is open, which means less light enters the camera.
Similarly, the slower the shutter speed, the more time the shutter is open, allowing more light to enter the camera.
Motion Blur and Freezing Action
Shutter speed plays a crucial role in capturing motion. A faster shutter speed freezes action, while a slower shutter speed creates motion blur.
For example, if you want to capture a fast-moving subject like a race car, you’ll need a fast shutter speed to freeze the action.
On the other hand, if you want to capture the motion of a waterfall, you’ll need a slower shutter speed to create a beautiful, flowing effect.
Shutter Speed and Exposure
Shutter speed also affects exposure. The longer the shutter is open, the more light enters the camera, resulting in a brighter exposure.
Conversely, a shorter shutter speed results in a darker exposure. Therefore, it’s important to adjust your shutter speed depending on the lighting conditions and the effect you want to achieve.
Shutter Priority Mode
Shutter priority mode is a camera mode that allows you to control the shutter speed while the camera automatically adjusts the aperture to achieve the correct exposure. This mode is useful when you want to control motion blur or freeze action, and you don’t want to worry about adjusting the aperture.
When using a slower shutter speed, it’s important to keep your camera steady to avoid camera shake and blurry images. You can use a tripod or stabilize your camera against a solid surface to ensure sharp images.
Mastering shutter speed is essential for capturing motion and controlling exposure. By understanding how shutter speed works and experimenting with different settings, you can create stunning images that capture the essence of movement and light.
Aperture and Depth of Field

What is Aperture?
Aperture refers to the opening in the lens of your camera that allows light to enter and reach the sensor. The size of the aperture can be adjusted to control the amount of light that enters the camera. Aperture is measured in f-stops, which are represented by numbers such as f/2.8, f/4, f/5.6, f/8, f/11, f/16, and so on. The lower the f-stop number, the larger the aperture and the more light that enters the camera.
Controlling Depth of Field
Depth of field refers to the range of distance in a photograph that appears to be in focus. A shallow depth of field means that only a small portion of the image is in focus, while the rest is blurred.
A deep depth of field means that most or all of the image is in focus. The depth of field is affected by the aperture size, the focal length of the lens, and the distance between the camera and the subject.
Aperture Priority Mode
Aperture priority mode is a shooting mode on your camera that allows you to set the aperture and the camera will automatically adjust the shutter speed to achieve the correct exposure. This mode is useful when you want to control the depth of field in your photos.
The Impact of Aperture on Exposure
The size of the aperture has a direct impact on the exposure of the photo. A larger aperture (lower f-stop number) will let in more light, which means the photo will be brighter. A smaller aperture (higher f-stop number) will let in less light, which means the photo will be darker. It’s important to keep in mind that changing the aperture size will also affect the depth of field in the photo.
In summary, understanding aperture and its impact on depth of field and exposure is crucial for any photographer. By adjusting the aperture size, you can control the amount of light that enters the camera and the range of distance that appears to be in focus.
Aperture priority mode is a useful tool for controlling the depth of field, and it’s important to remember that changing the aperture size will also affect the exposure of the photo.
The Exposure Triangle Explained

Balancing ISO, Shutter Speed, and Aperture
The exposure triangle is the relationship between ISO, shutter speed, and aperture, which together determine the exposure of a photograph. ISO refers to the sensitivity of the camera’s sensor to light, while shutter speed determines the duration of time the sensor is exposed to light, and aperture controls the amount of light that enters the camera.
To achieve a well-exposed photo, you need to balance these three elements. If you increase one, you’ll have to adjust the others accordingly. For example, if you increase the ISO, you can use a faster shutter speed or a smaller aperture to compensate for the increased sensitivity.
Understanding Exposure Value (EV)
Exposure value (EV) is a measure of the amount of light in a scene. It’s a combination of the aperture, shutter speed, and ISO settings. A higher EV means more light in the scene, while a lower EV means less light. Understanding EV is essential for getting the correct exposure in your photos.
Manual Mode and Exposure Control
Manual mode gives you full control over the camera’s settings, allowing you to adjust the ISO, shutter speed, and aperture to achieve the desired exposure. It’s the best mode to use when you want to have complete control over the exposure triangle. However, it can be challenging to use, especially if you’re new to photography.
In manual mode, you’ll need to adjust the settings yourself to get the right exposure. You can use a light meter to help you determine the correct settings, or you can use the camera’s built-in metering system to guide you.
Overall, understanding the exposure triangle and how to balance ISO, shutter speed, and aperture is essential for getting well-exposed photos. With practice, you’ll be able to master manual mode and have complete control over your camera’s settings.
Camera Settings and Shooting Modes

When it comes to capturing the perfect shot, understanding your camera settings and shooting modes is crucial.
This section will explore the different shooting modes available on most cameras and how to use them effectively.
Manual vs Auto Mode
One of the first decisions you’ll need to make when shooting with your camera is whether to use manual or auto mode.
In manual mode, you have complete control over the camera settings, including shutter speed, aperture, and ISO. This allows you to fine-tune your settings for the best possible shot.
On the other hand, auto mode allows the camera to make these decisions for you. While this can be convenient, it often results in less control over the final image. However, if you’re just starting out with photography, auto mode can be a great way to get comfortable with your camera before moving on to manual mode.
Understanding Program Mode
Program mode is a hybrid between manual and auto mode. In this mode, the camera sets the shutter speed and aperture automatically, but you still have control over other settings such as ISO and exposure compensation. This mode is great for situations where you need to quickly adjust your settings without having to switch to full manual mode.
Exploring Scene and Creative Modes
Most cameras also come with a variety of scene and creative modes, which are designed to help you capture specific types of shots.
Scene modes are pre-set settings that optimize your camera for specific situations, such as portraits or landscapes.
Creative modes, on the other hand, allow you to experiment with different effects and filters to create unique images.
While these modes can be helpful in certain situations, it’s important to remember that they are not always the best option.
For example, using the landscape mode may result in oversaturated colors and loss of detail in the shadows. It’s always a good idea to experiment with different modes and settings to find what works best for you and your subject.
In conclusion, understanding your camera settings and shooting modes is essential for capturing the perfect shot. Whether you prefer manual or auto mode, experimenting with different modes and settings can help you achieve the desired effect. By taking the time to learn your camera’s capabilities and limitations, you’ll be well on your way to creating stunning images.
Advanced Photography Techniques

As you become more comfortable with ISO, shutter speed, and aperture, you may want to explore some advanced photography techniques to take your skills to the next level.
Here are some tips to help you get started:
Using Flash and Lighting
When it comes to photography, lighting is everything. If you’re shooting indoors or in low-light conditions, you may need to use a flash to get the right exposure. However, using a flash can be tricky, especially if you’re not familiar with how it works.
To get the best results, consider investing in an external flash that you can mount on your camera. This will give you more control over the direction and intensity of the light, which can help you create more dynamic and interesting photographs.
Working with Tripods and Stabilization
If you’re shooting in low-light conditions or trying to capture a moving subject, you may need to use a tripod or other stabilization device to keep your camera steady. This will help you avoid blurry or shaky photos, which can be frustrating and disappointing.
When choosing a tripod, look for one that is sturdy and easy to use. You may also want to consider investing in a remote shutter release, which will allow you to take photos without touching your camera and potentially introducing shake.
Exploring Focal Length and Lens Choices
The focal length of your lens can have a big impact on the look and feel of your photographs. A shorter focal length (such as 18mm) will give you a wider field of view, while a longer focal length (such as 200mm) will give you a narrower field of view and more magnification.
Different lenses can also give you different effects. For example, a wide-angle lens is great for landscapes and architecture, while a telephoto lens is better for portraits and wildlife photography.
By experimenting with different focal lengths and lenses, you can create a wide range of unique and interesting photographs.
Post-Processing and Exposure Adjustment

Adjusting exposure in post-processing is an essential step in digital photography. It can help you fix underexposed or overexposed images and enhance the overall quality of your shots.
In this section, we will explain some of the techniques you can use to adjust exposure and improve your images.
Exposure Compensation Explained
Exposure compensation is a feature that allows you to adjust the exposure of your images in-camera. It is usually represented by a scale that ranges from -3 to +3, with 0 being the default exposure. When you adjust the exposure compensation, you are telling the camera to increase or decrease the exposure by a certain amount.
For example, if you are shooting in a low light situation, you may need to increase the exposure compensation to get a brighter image. On the other hand, if you are shooting in bright sunlight, you may need to decrease the exposure compensation to avoid overexposure.
Using Histograms for Better Exposure
Histograms are graphical representations of the tonal distribution in your image. They can help you determine if your image is properly exposed or not. A histogram is usually divided into several sections, each representing a different tonal range. The left side of the histogram represents the shadows, the middle represents the mid-tones, and the right side represents the highlights.
To use histograms for better exposure, you need to analyze the distribution of tones in your image. If the histogram is skewed to the left, it means that your image is underexposed. If it is skewed to the right, it means that your image is overexposed.
Fixing Overexposed and Underexposed Images
Overexposed and underexposed images can be fixed in post-processing by adjusting the exposure, brightness, and contrast. However, it is important to note that the amount of adjustment you can make depends on the dynamic range of your camera.
If your camera has a limited dynamic range, you may not be able to recover details in the highlights or shadows. In this case, it is better to expose your image correctly in-camera to avoid losing details.
In conclusion, adjusting exposure in post-processing can help you fix underexposed or overexposed images and enhance the overall quality of your shots. By using exposure compensation, histograms, and other techniques, you can achieve better results in your digital photography.
Special Considerations for Film Photography

When it comes to film photography, there are some special considerations that you need to keep in mind.
While ISO, shutter speed, and aperture are still important, there are some unique qualities of film that you need to be aware of.
Film Speed vs Digital ISO
While digital cameras have a set ISO range, film comes in different speeds. The ISO of film refers to its sensitivity to light.
The higher the ISO, the more sensitive the film is to light, but also the more grainy the image will be. It’s important to choose the right film speed for the lighting conditions you’ll be shooting in.
The Unique Qualities of Film Grain
Film grain is a unique characteristic of film photography. It refers to the visible texture or “graininess” of the image. Some photographers prefer the look of film grain, while others find it distracting. It’s important to keep in mind that different types of film have different levels of grain, so you’ll need to choose the right film for the look you’re going for.
Choosing the Right Film for Your Camera
When choosing film for your camera, it’s important to consider the type of camera you have and the lighting conditions you’ll be shooting in.
Some film cameras have built-in light meters that can help you choose the right settings, while others require you to manually set the ISO, shutter speed, and aperture.
For night shots, you may want to choose a film with a higher ISO to capture more light. For bright outdoor conditions, a lower ISO film will help prevent overexposure.
It’s also important to consider the look you’re going for. Different types of film have different color tones and levels of contrast, so you’ll need to choose the right film for the look you want to achieve.
Overall, when shooting with film, it’s important to take your time and carefully consider your settings and film choice. With practice, you’ll be able to achieve the unique and beautiful look that only film photography can provide.
